


We want to start right off by saying we love our local meat processing guy. He’s the best Santa Claus ever. We get tons of gift-wrapped packages, and they all contain meat!
However… It’s 2020 and things are weird. Between the wave of supermarket shortages and the huge surge of hunting permits sold, lots of meat cutters are booked up well into 2021 at this point.
If you have a knifeslinger that can get you taken care of, we highly recommend supporting your local butcher shop. If, however, you don’t have such a meat master on hand, here’s everything you’ll need to know to turn your elk/deer/antelope into a freezer full of steaks, roasts and burger.
The Gear
Here’s what you’ll need to secure an icebox full of deliciousness:
- Electric or hand crank hoist – Skinning the critter is far more easy when you can hang the beast. This can be a garage rafter, a tree limb or even a tall folding ladder.
- Skinning knife – The magic ratio here is a knife with a big, easy-to-grip handle and a small, maneuverable blade.
- Fillet knife – This will be your go-to when we get to the butchering part. Look for a handle that won’t get slippery when wet and the blade should have some flex to it.
- Bone saw (or, in a pinch, a hack saw will work) – Our personal favorite is a combo bone saw/tree saw that fits in our pack.
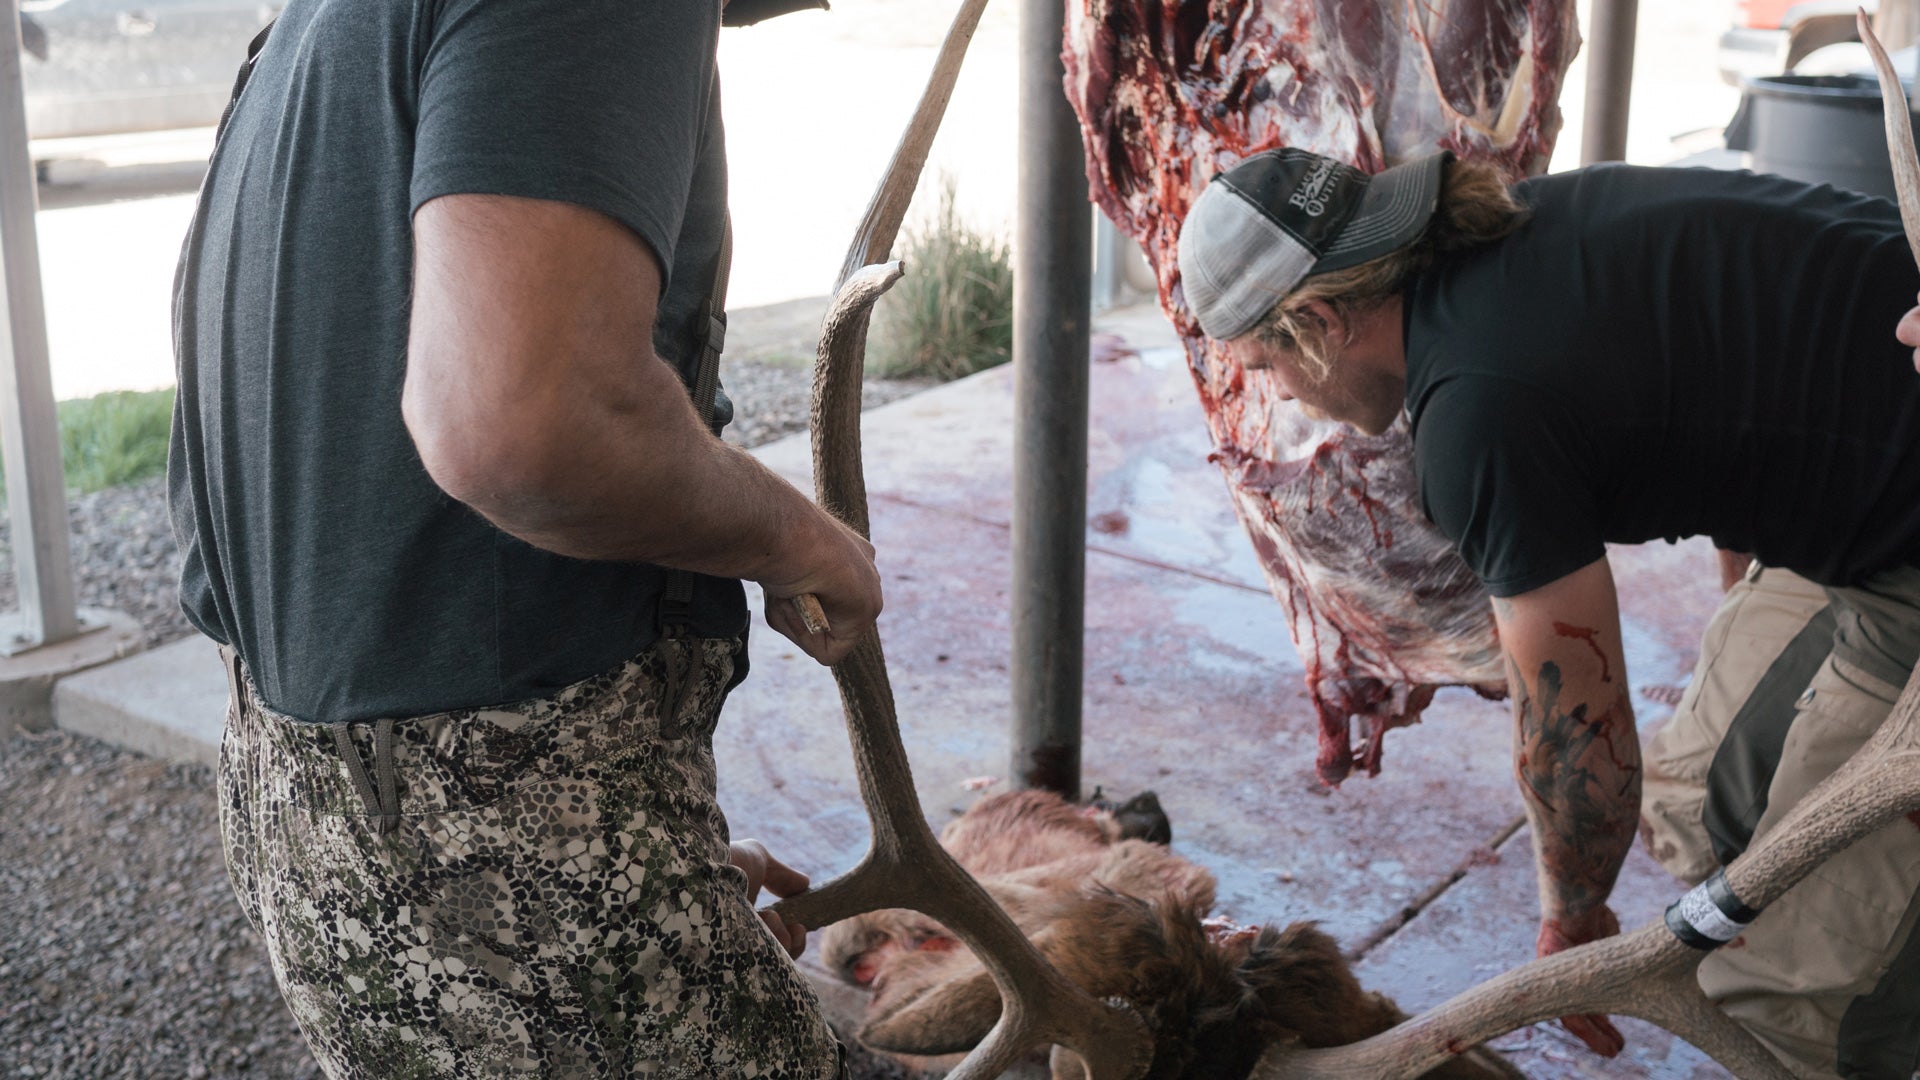
Skin That Meat Wagon
The first step is to remove the hide. It’s not a hard task, but it can be time consuming. You’ll be using a knife near the tasty bits, so pay attention to only cut what needs cut.
If you can hang the animal, this gets a whole lot easier. We typically hang from the antlers, so the head is up and the feet are down. Assuming you did a good job field dressing the animal (which you can read all about here), the innards are out and the meat had a chance to drain of blood.
Start with a circular cut around the neck, then extend that cut down to the slit you made to remove the guts. Now make four more circular cuts, one just above each knee. Run a cut from that circle up the inside of each leg until they meet up with the chest incision.
Now, work your fingers under the hide at the neck, and as you pull it away, use your skinning knife to help cut away any tissue holding it in place. If the carcass is cooled, you should be able to just peel the hide away like a banana.
Continue to work down the animal. When you get to the knees, you can remove the legs below the knees (lopping shears work great here). When you get to the tail, simply sever it at the base and keep peeling. In no time at all, you’ll have a single piece of hide your significant other can turn into all kinds of Etsy wares.
Now you can move the animal to the processing table (give it a good bleach water rinse) and remove the head. Simply cut through the meat with your fillet knife at the base of the skull. When you find vertebrae, you can cut it with a bone saw or work out some frustration and simply twist it back and forth until it pops free.
Breaking It Down
What you have before you is a solid hunk of edible material. You just need to remove it from the frame.
First, get two large, clean pans. One will be for the good meat (tougher cuts that will become burger, jerky, sausage, pot roasts, stew meat) and the other for the great meat (steaks, dry roasts, kabobs).
Detach the front legs, which is surprisingly easy to do. Just grab a shank and pull it away from the body, cutting the connective tissue inside the joint. Now start to cut all the way around, between the rib cage and leg, eventually getting in between the shoulder blade and the back. With a sharp enough blade, you should be able to simply slice off the front legs.
Now we remove all the meat we can from the neck, brisket and flank. No need to be super careful here, as most of this will become sausage, ground or stew meat. The goal is to pick as much meat off as possible. It adds up quickly, so be sure to get all of it. This all goes into the good pan.
The backstraps are our next target. These primals will come off in one long chunk if you do it right. Cut two long slits from the rump to the base of the neck—one tight along the backbone, the other right along the top of the ribs. Make a horizontal cut across these two slits at the base of the neck, and lift the backstrap. Use your knife to scrape out as much of this glorious meat as you can. This is for the great pan.
Trim the meat from the hind shanks and add to the good pan. For the rest of the quarter, silver skin creates seams between the large muscles. Wet your fingers and work them into these seams to separate the muscles, then simply cut the roasts off the bone in complete pieces. These go into the great pan.
Finally, cut the shank meat from the front legs and add this to the good pan. The upper roasts from the front shoulder are relatively sinew-free, but don’t make very good roasts or steaks. Add this to the good pan and use these sizable chunks for jerky or stew meat.
Prepare for the Deep Freeze
Despite what bears may think, wild animal fat tastes nasty. Leaving it on your steaks and roasts will give your meat that gamey taste that often turns people off to wild game meat. It also is more susceptible to freezer burn, which makes everything gym-sock nasty.
So, we trim every little bit of fat and silver skin off before we package and freeze. The extra effort now will pay off 100X in the long run. This is detail work, so take your time and be sure your fillet knife is razor sharp. You just want to remove the fat and silver skin, leaving as much of the meat as possible.
We also try to leave muscles as whole as possible. The more cutting we do, the more surface area we create. Surface area is a magnet for freezer burn and moisture loss. For example, only cut the backstraps down to a manageable size (12 inches or so) and not into individual steaks. We keep the primal (as the trendy chefs call it) intact until we’re ready to grill.
Once you have all the nastiness trimmed off, give everything a good rinse to get rid of stray hairs or any skin or fat clinging on. Pat everything dry and let them sit for 15-20 minutes to make sure all the excess water is gone.
The only thing left now is to wrap everything in a couple layers of good freezer paper, label the cut, date it, and get it in the freezer. If you prefer vacuum sealing, we recommend putting a couple layers of seals. Just a little extra insurance against a leaky bag.
Ideally, you won’t have any problems getting on the schedule of your local meat processor (support the slicers!), but if you do, we hope this guide will help you break down your animal. It may seem a bit intimidating at first, but with a little practice and a little patience, you’ll have it down in no time.


