


At Badlands, we’re never afraid to tackle the burning issues in the hunting world.
Does scent control work?*
Is .30-06 a dead cartridge?**
Is teriyaki beef jerky better than original?***
Add to that list, what’s the best way to field dress a game animal?
“How to gut a deer” is a burning question on many minds this time of year. It ranks right up in the Google search rankings with “Is The Rock real or a cartoon character?”
Fear not, Badlandians, for today we’re going to wallow into the heart (and lungs, liver and intestines) of the matter and break down the best ways to break down a critter.
There are two schools of thought on getting your deer or elk (or moose, caribou, reindeer, etc.) ready to transport from field to freezer. Field dressing and the gutless method. Both have their place, as well as their drawbacks.
You will need a few things, no matter the method. So be sure you have a few pairs of latex or nitrile gloves, dedicated dressing knives and gut hooks, bone saw or bolt cutters, some game bags (if doing the gutless) and some rope or a gimbal.
Field Dressing
This is what most people think of when they talk about how to gut a deer. It’s the surgical removal of the offal, from windpipe to the anus. It’s messy, it’s kinda nasty, and it has its own unique smell that you never quite get used to. But, it’s pretty straightforward and goes pretty quick once you’re used to it.
Field dressing is recommended when you have a smaller animal, like a whitetail or mule deer. Since this keeps the animal intact, it’s also a great method if you’ll be hanging the carcass in deer camp for a few days. Depending on your state regs, it may also be required for legal transportation (check that boring little book for your state).
Benefits
- Take home as much usable meat as possible
- Get to thoroughly inspect the deer for signs of damage
- Convenient packaging (the deer hide)
Negatives
- Messy
- If done improperly, can taint the meat
- We did mention it involves the anus, right?
To start, try to find a slope and position your deer with the head uphill and the tail downhill. Now, take your sharpest knife and make a cut all the way around the anus. Go over this cut a few times until it’s a few inches deep and you’re confident the colon has been fully cut away from the pelvic bone. Be careful, any nick to the colon or intestine can mean spoiled meat and the smell may mean a return of your morning biscuits and gravy.
Next, spread the hind legs and either have your hunting buddy hold them apart or break out the rope and tie them off to some trees. If you’re doing this solo, be sure to prop the carcass up with some rocks or logs so it doesn’t roll around.
Now, grab the skin where it makes a “V’ between the rear legs. On does, this is just below the milk sac; on bucks, it’ll be just above the testicles. Cut a 1-inch deep slit through the skin here. If legal in your state, you can remove the buck’s genitals here.
Stop and say you’re sorry for doing that to another male, then using that slit as a starting point, use the gut hook to open the belly from the pelvic bone to the breastbone. If you don’t have a hook and are using a knife, use your index and middle fingers inside the hole to pull the hide up and away from the organs. Hold the blade facing out and carefully cut all the way to the rib cage. Whatever you do, don’t puncture any of the organs. There are intestines and a bladder in there waiting to ruin your day.
If you are having the deer mounted at the taxidermist, stop here. If not, keep cutting up until you reach the neck. It’s a chore, but slow and steady wins the race and saves the meat.
Now, using a bone saw or bolt cutters, cut through the ribs and separate the two halves. This will make for some horror-movie level cracking sounds, but if you get the ribs spread enough, they should stay open a bit on their own.
Take your knife and sever the diaphragm. This is the thin membrane that separates the chest from the abdominal cavities. Cut it away from all sides of the cavity walls and spine.
Now, reach up into the neck and grab the windpipe. Pull it toward you to make it taut and slice it in half. It’s a tough tissue, so be careful not to slip and ruin the meat by losing a finger in there.
If you’ve cut the anus free, severed the diaphragm and cut the windpipe successfully, you now should be able to grab that windpipe and pull the entire gut sack out of the body. (Now you see why we did this on a slope, right?)
In most states, it’s okay to leave the gut pile there, but be sure to check your state regs. If you’re on public land, do your field dressing as far off the deer trails as possible. Much like you, if a deer comes around the corner and sees and smells a pile of his neighbor’s innards, he will probably decide to leave town for a while.
Pro Tip: If on private land, set up a camera in front of the gut pile and watch the local scavengers in action!
Now you can load up your gutted critter and head home or to the processor.
The Gutless Method
While this is commonly used with larger animals like elk and moose, the gutless method has been gaining popularity with whitetail and mule deer hunters for its ease and cleanliness. In short, we’re breaking the animal down into manageable pieces, making them easier to pack out with your Vario Pack and Meat Shelf ( wink wink, nudge nudge).
In the gutless method, you never open the abdominal cavity, and therefore remove all the risk of tainting the meat (or throwing up in front of your friends). You will definitely want to check your state hunting regulations, as some states require the animal to be transported whole to the check station.
Benefits
- Quick
- Clean
- Easy
Negatives
- Not legal everywhere
- Doesn’t get every possible scrap of meat
- Exposes more of the meat to the elements
Once you have your deer or elk down, get it laying flat on one side. Now, remove the hide from the knees all the way to the spine. This exposes the meat you want to get to and also provides a nice big tarp to lay the quarters on as you remove them. When done, you should have the neck, front shoulder, ribs, hind quarter and backstrap exposed.
Next, remove the quarters starting with the front shoulder. The only thing holding this together is muscle, so lift the leg and start cutting between the shoulder and rib cage. (Who knew that a huge elk had the same delicate shoulder as a major league pitcher?) The hind quarter is attached by muscle, but also a ball joint. Cut through the muscle along the hip bone until you reach the ball joint, then you should be able to twist that free.
With the quarters cleared and cooling on the hide, remove the neck meat, the brisket, the rib meat, etc. Now’s the time to get the backstrap, too. Place these all out on the exposed hide to cool or, better yet, get them right into game bags and hang them if possible. Cooling the meat as quickly as possible makes for better results on the table.
Finally, go for that red gold: The tenderloin. Make a small incision along the backbone, just above the rear flank. There lie those tender, juicy, flavorful tenderloins. Technically you have to enter the body cavity for them, but it’s a small cut and they are totally worth it.
Now that you have that side done, get the meat in game bags, lay the hide back over the carcass and roll it over. Repeat everything we just talked about on side two. Boom, done.
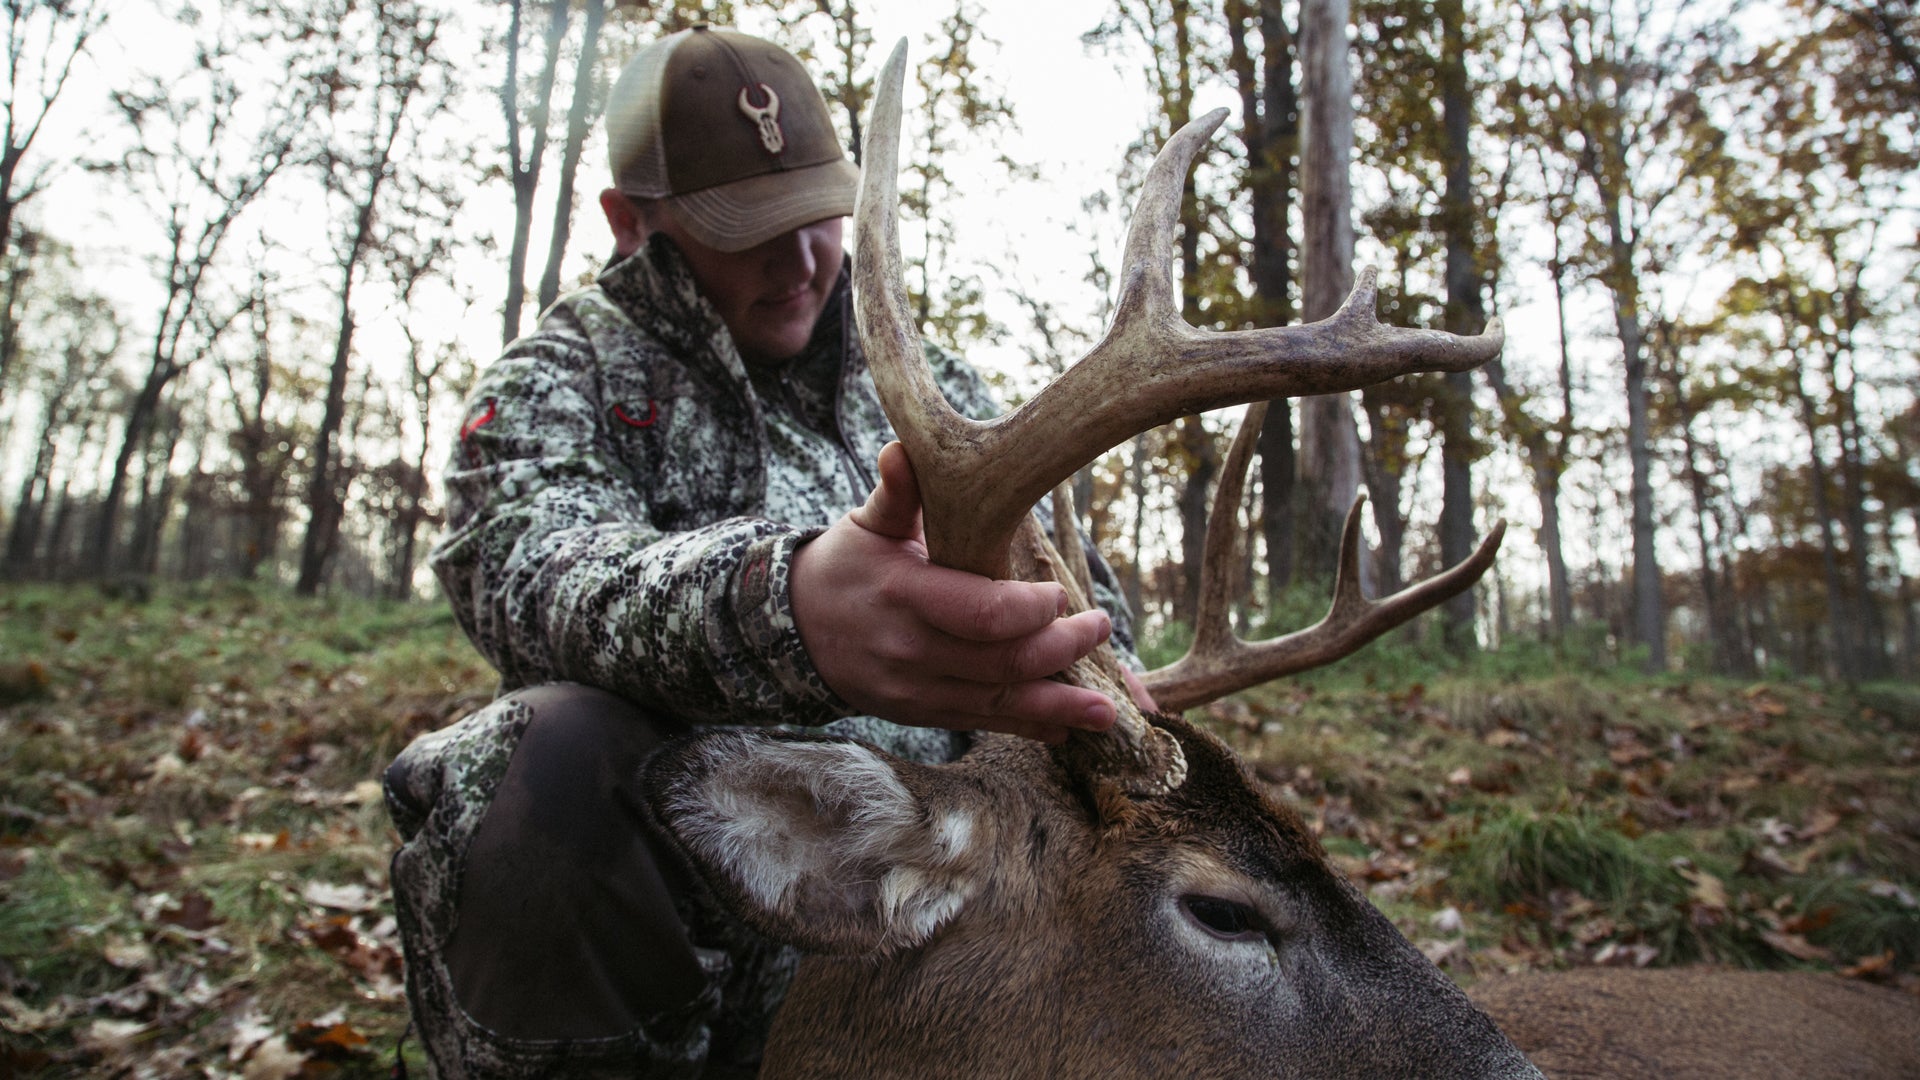
If this is a trophy buck, you need to take a couple additional steps with the gutless method to protect the mount for the taxidermist and cape out the animal.
Start by making a cut all the way around the front legs at the knees. From that cut, make another incision up the back of the leg to the armpit. Then make an angled cut that starts with the armpit and meets the spine above the breastbone.
Now you can skin the hide from the knees and chest, pulling the cape up over the head. Skin the animal all the way up to the base of the skull.
Once you reach that point, cut through the neck meat all the way around until you completely expose the joint of a vertebra. It’s time to get your inner Mortal Combat on and FINISH HIM! You shouldn’t need a saw here, just twist the head back and forth until you can snap the head right off, Jean-Claude Van Damme style.
There you go, you’ve got a perfectly caped mount ready for transport to your taxidermist!
No matter which method you choose, the more time and attention to detail you spend on getting every last fiber of meat out, is time well-spent. We know how hard you work to get that animal down, so don’t let any of that effort go to waste by leaving meat behind.
It doesn’t matter if you are a backyard butcher or rely on your local processor to turn that animal into steaks, burger and sticks. The first step to delicious venison or elk is smart, safe field dressing.
* Yes
** Nope
*** Hells yes, it is


